Loading Table of Contents...
How to Design a Website with Canva in 5 Easy Steps
Learn how to design a website with Canva, from choosing a template and editing the layout to basic SEO, connecting a domain, and publishing your site.
Designing a website with Canva lets beginners start with a ready-made template or a blank page, then build a layout, edit content, check the mobile experience, set up basic SEO, and connect a domain. Connect Tech walks you through each step so you can create a simple, easy-to-use website that meets your needs.
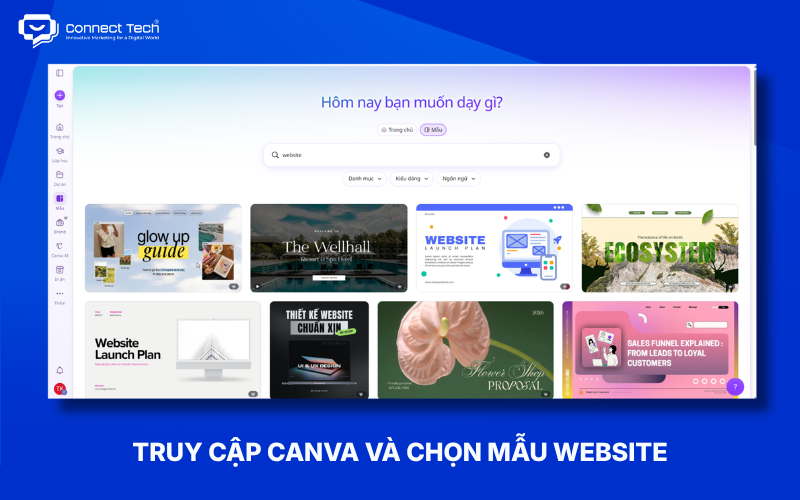
Step 1. Open Canva and Choose a Website Template
Choosing the right template makes website design in Canva faster because you can work with an existing layout instead of building the entire interface from scratch.
After signing in to Canva, open its Website tool and look for a template that suits your purpose. Canva offers categories such as Business, Portfolio, Personal, Event, and Landing Page.
Prioritize a layout that closely matches the structure you need. A template may have attractive images, but if its layout does not suit your content, you may spend more time editing it.
If you cannot find a suitable template, start with a blank design. This works well when you already have clear brand guidelines or want to create your own layout.
Step 2. Plan the Layout and Add Pages
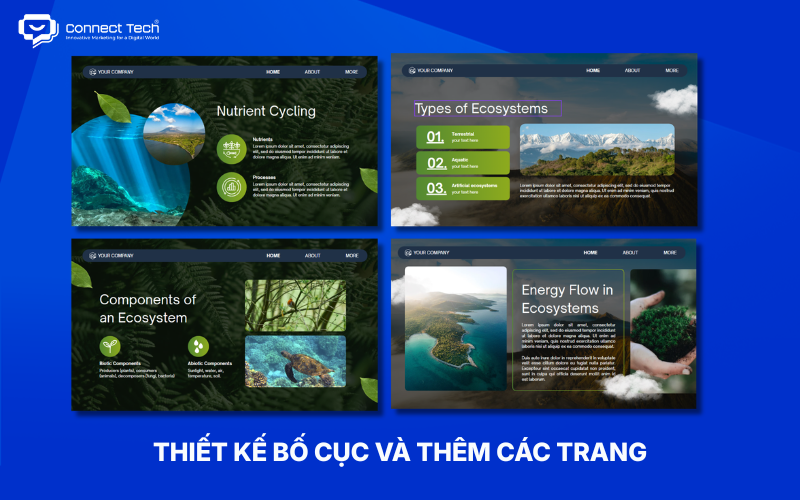
A clear layout organizes your Canva website's content and helps visitors find what they need. Arrange sections around the user's journey instead of placing content at random. A simple structure might follow this order:
Hero → About → Services → Projects → CTA → Contact
The hero section should quickly explain what the website offers and what action visitors can take. Each following section should provide the information they need before leading them to a call to action (CTA).
Canva currently supports both single-page and multi-page websites, so choose a structure that fits the amount of content you have. A simple site may use one long page, while a site with distinct content areas can split them into pages such as About, Services, and Contact.
You can also set up a navigation menu to help visitors reach specific pages or sections. Links can point to a page on the website, a section, or an external URL.
Step 3. Edit the Website's Design and Content
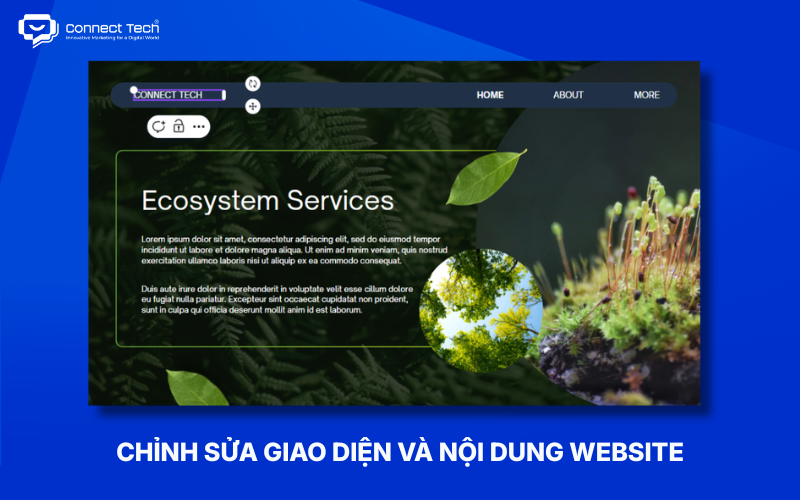
Updating the content and brand elements turns a Canva template into a website that feels like your own.
Replace the sample logo, colors, and fonts with elements that match your brand. Canva's visual editor lets you change text, images, videos, graphics, and other design elements directly.
Images should support the content rather than simply fill empty space. Replace stock images with photographs of your products, team, projects, or actual business location.
Place CTAs where they make sense in the user's journey. Common examples include:
- Contact Us
- Sign Up
- View Services
- View Portfolio
- Call Us
- Message Us on Zalo or Messenger
Finally, check that the logo, colors, fonts, images, and spacing between sections are consistent. A cohesive design makes the website look more professional and easier to recognize.
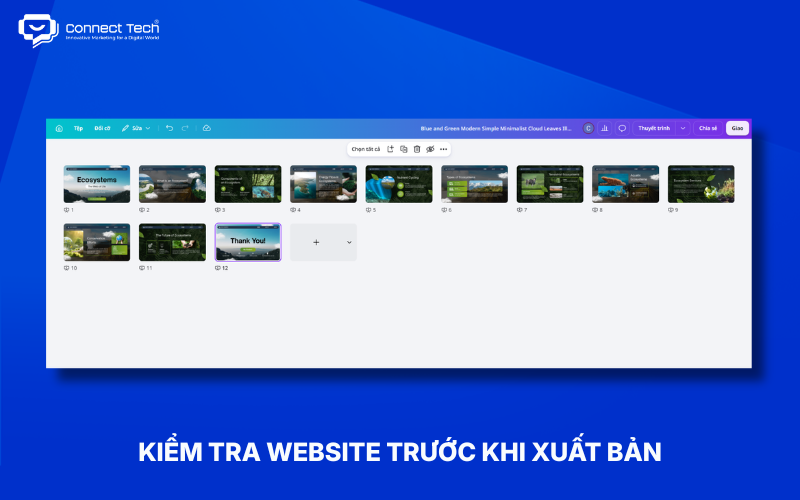
Step 4. Check the Website Before Publishing
A final review helps you catch small errors before the site becomes public and prevents avoidable problems for visitors.
Use this pre-publication checklist:
- The content has no spelling mistakes.
- The logo and brand information are correct.
- Images display clearly.
- The navigation menu works.
- Buttons and CTAs lead to the right destinations.
- Contact forms work, if the website uses them.
- The website displays well on mobile.
- The title and description are set.
- Each page has a clear, readable URL.
- Search engine visibility is enabled if you want Google to index the site.
Check image dimensions and quality before publishing as well. Oversized images can increase page weight, while low-quality images can make the design look less professional.
Step 5. Choose a Domain and Publish the Website
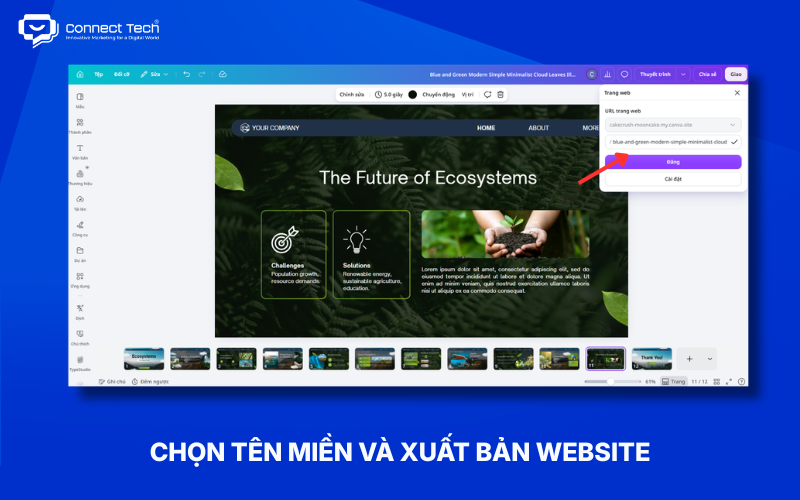
Choosing a domain and publishing are the final steps in making your Canva website publicly accessible. Canva lets you use a free Canva domain or connect your own domain, depending on your plan and publishing option. For a business website, a custom domain usually creates a more professional and memorable address.
Before selecting Publish Website, review the URL, content, and page structure once more. Canva uses HTTPS for published websites to secure the connection between visitors' browsers and the site.
After publishing, you can return to Canva to change content, images, or layouts and update the live website. This is especially useful for portfolios, landing pages, event websites, and informational sites whose details change often.
For simple needs, Canva lets you create and update a website yourself without relying on a development team. Businesses that need a website for SEO, marketing, online sales, or long-term operations may benefit from a custom-built solution with greater flexibility and room to grow.
Connect Tech develops websites with technologies including Laravel, Next.js, and Nuxt.js, combining design, SEO, e-commerce, and technical solutions to match each business's needs
Table of Contents
Related news
Top tools to check website speed and optimize effectively
Learn how to check website speed with accurate tools, analyze what slows your site down, and optimize website load speed to increase conversions.

How to Design a Landing Page with Free Tools
Learn how to design a landing page with LadiPage, Canva, WordPress, Wix, Google Sites, Mobio, SITE123, and GetResponse, from start to finish.

Top 8 AI Website Design Tools and How to Use Them
Explore eight AI website design tools, including Wix, Figma, Hostinger, and TeleportHQ, and learn how to create, edit, and optimize your website for SEO.
How to Design a Website with Google Sites: A Beginner's Guide
Learn how to build a Google Sites website from start to finish: create pages and menus, design the layout, add content, integrate Google tools, connect a custom domain, and publish.
How to Design a Website with Canva in 5 Easy Steps
Learn how to design a website with Canva, from choosing a template and editing the layout to basic SEO, connecting a domain, and publishing your site.
What is a responsive website? How to test & optimize for conversions
What is a responsive website? A guide on how to test display performance and responsive website design solutions to help increase conversion rates and save ads budget effectively.